
Backstory: When we moved this past summer, we knew we had to purge our old National Tree Company Dunhill Fir tree. It was 6 years old, had gone through one move already and some of the lights stopped working. It was an awesome tree and I would have gotten it again except for one problem. It wouldn’t fit in our new house…

So we downsized on our tree. And by “downsized” I mean in width. The area in the new house I was going to put it was going to need something more narrow, but not a pencil tree. After some searching on the internet, I decided to stick with the National Tree Company brand (not sponsored, not a collanotation, links are affiliate). We ended up upgrading to a more “real feel” tree in a slim profile- the Nordic Spruce with Duel Color LED lights , and wow, it is gorgeous!

Unfortunately, the downsizing created a bit of a problem for us. We are “collected ornament” tree people. We don’t do a styled tree, as much as we admire them. We love our collection of ornaments, and pulling them out each year remembering where each one came from. But, the smaller profile tree couldn’t handle the boxes of amassed ornaments we have! And this is where our “cheap” tree enters the story…
It’s already an expensive time of year, especially having just gone through a move, so I knew I’d have to look into more standard artificial trees. And I also knew the area I wanted it to go needed not just slim- but SKINNY. After a search on Amazon, I can across the National Tree Company Kingswood Fir 7.5’ Unlit Pencil Tree for less than $100!! One thing I noticed in the reviews were people saying it wasn’t ”full enough” and things of that sort. If you’re a seasoned artificial tree owner, you know the drill- but if you’re new to it, this ones for you. Let’s see just how fluffy this affordable tree can get…

The stand is pretty basic and comes with a screw to tighten the bottom piece in.
Pro-Tip: Don’t tight this section down yet! While it’s in there loose, you can spin the tree while you move from branch to branch.
Now let’s start fluffing!

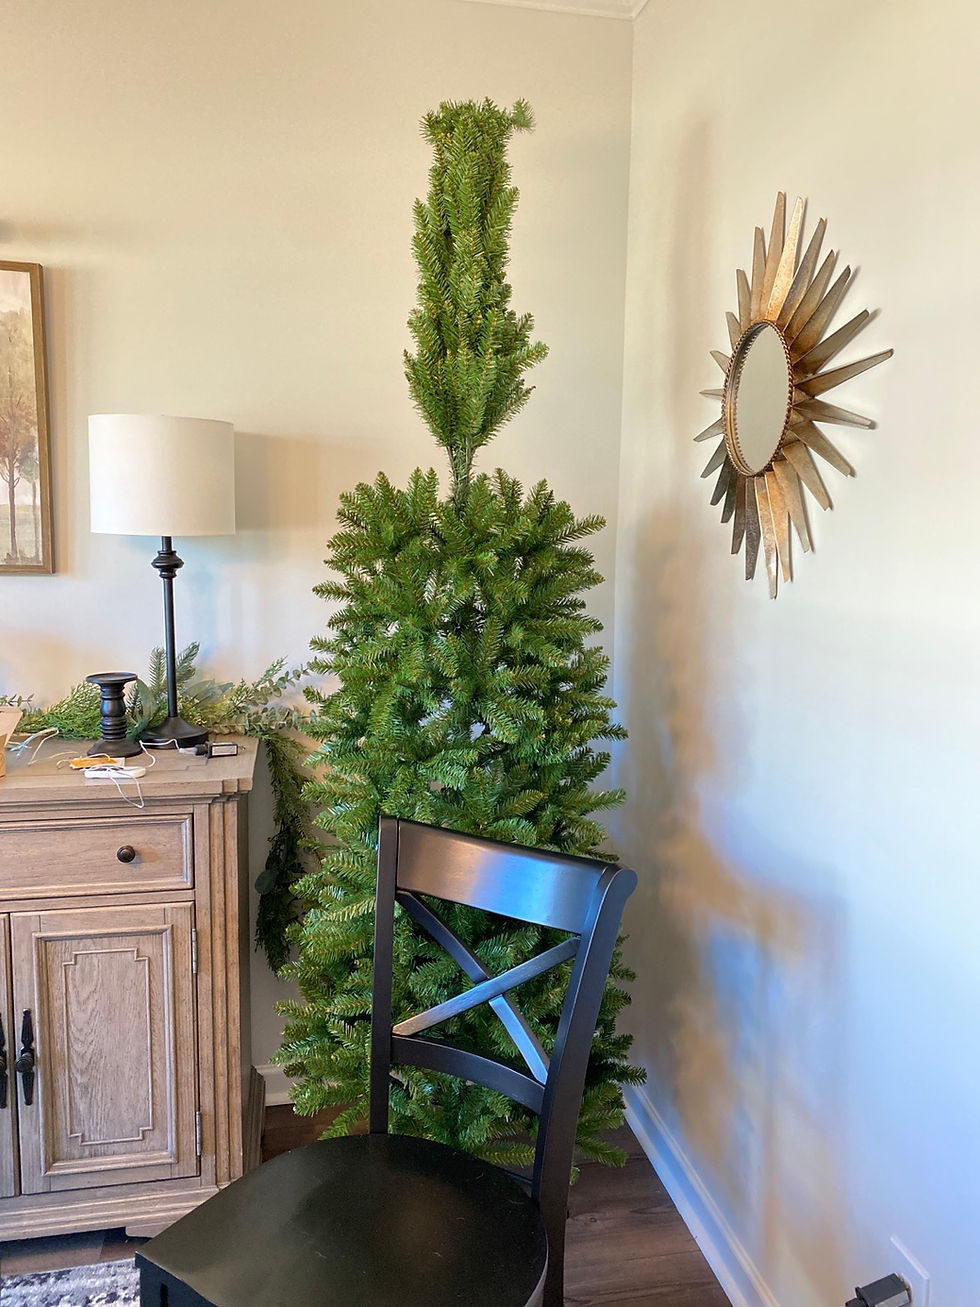
Each large “branch” has a clump of green branches of varying sizes. You’ll see that when you pull them out, they do have their own kind of direction.
Pro-Tip: Always start on the inside branches and work out.
You’ll want to be pulling some of those innermost branches almost back into the tree. We want to create fullness. If you only pull them outwards or out and up, you’ll lose out on that full look and get lots of gaps. Try to create a sphere or starburst like shape with the branches, going back, up, down, and out. It doesn’t have to be perfect, in fact it’s better if it’s not. Just don’t be afraid to move and straighten each piece. Some of the branches might be curled up a bit from packaging. You want to get everything you can out of each branch- so straighten them out to fill in every nook and cranny!
Pro-Tip: Wear gloves if the branches are too scratchy. This isn’t a quick process, so you may need to protect those hands!

I also like to work from the bottom up. That way I can be sure to be pulling pieces from the next level downwards if needed to continue that fullness. As you can see, I like to create an outward shape with the branches in all directions, leaving some going straight up. Not only does it look natural, but it gives us that fullness we’re going for.
Pro-Tip: Be sure and step back to look at your work as you go along, and adjust as needed. It’s easier to do this regularly, one section at a time, than waiting for the end and having to search too much for areas that need help.
Now’s the time to tighten up that first section- and let’s get that second section popped in place!

Can you even believe that branches that look that sad and sparse can get that thick and lush! I’m telling you- the proof is in the fluffing. Keep working bottom up and inside out. Bring those inside branches down and out, focus on creating an imperfect starburst- and keep stepping back and adjusting as you go along. You got this!

Here’s another up close look at the “starburst” shape we’re going for. Those inner branches going out and back, and making sure you pull some out and down are key to this look. Now it’s time for the final piece, and this one is a very different fluffing process than the last two…
Unlike the other sections, where the branches came out on hinges, these are put together in little clumps taped together. Each clump will need to be pulled away from the tree, and then each little branch adjusted and fanned out.

Repeat this until all of the clumps are pulled outward and fluffed, just as we have been doing, in starburst shapes. Then you’ll reach the last part with individual branches that just need to be pulled out and apart. Make sure the tallest one is left up for the tree top!

Now step back and admire your efforts!

It’s hard to believe this is the same scraggly tree that came out of the box! And as fantastic as it looks, we’re not done yet…
Tuck in some mini lights, which you can usually get for under $3 at a big box store, amp it up with some plug-in fairy lights (I got mine here and have them on my big tree and in all my garlands. Best part is you don’t have to replace batteries!), and top it off with a little star perfectly proportioned for your pencil tree.
Pro-Tip: Bend a couple of the top branches together and tuck them into your star’s base to secure it. Use twist ties if needed for more support.

Now just slide your star on for a snug fit…

And there we have it! Full, fluffed, well-lit and ready for the family to start decorating!


Whether you‘re looking for a slim tree for a special Christmas theme, or need an extra for your surplus of ornaments, the key to success with any tree is a proper and thorough fluffing. And this process works with any tree of any style at any price point. So whatever artificial tree you might be putting up in this year, remember to take your time, work bottom up and from the inner branches out. So tell me, are you a themed tree or a collected ornaments tree kind of person?? Leave a comment below!
Products shown: All links are affiliate unless otherwise noted. Not sponsored. All products purchased with my own money.
Tree Topper- Kurt Adler 7” Star Tree Topper
Plug-in Fairy Lights- Minetom 100 light warm white plug in fairy lights
Tree Skirt- 24” Faux Fur Brown Tree Skirt
I used these tips when we set up our artificial tree. We've fairly new to artificial trees and your tips were so helpful in making our tree look better than ever. Thank you!